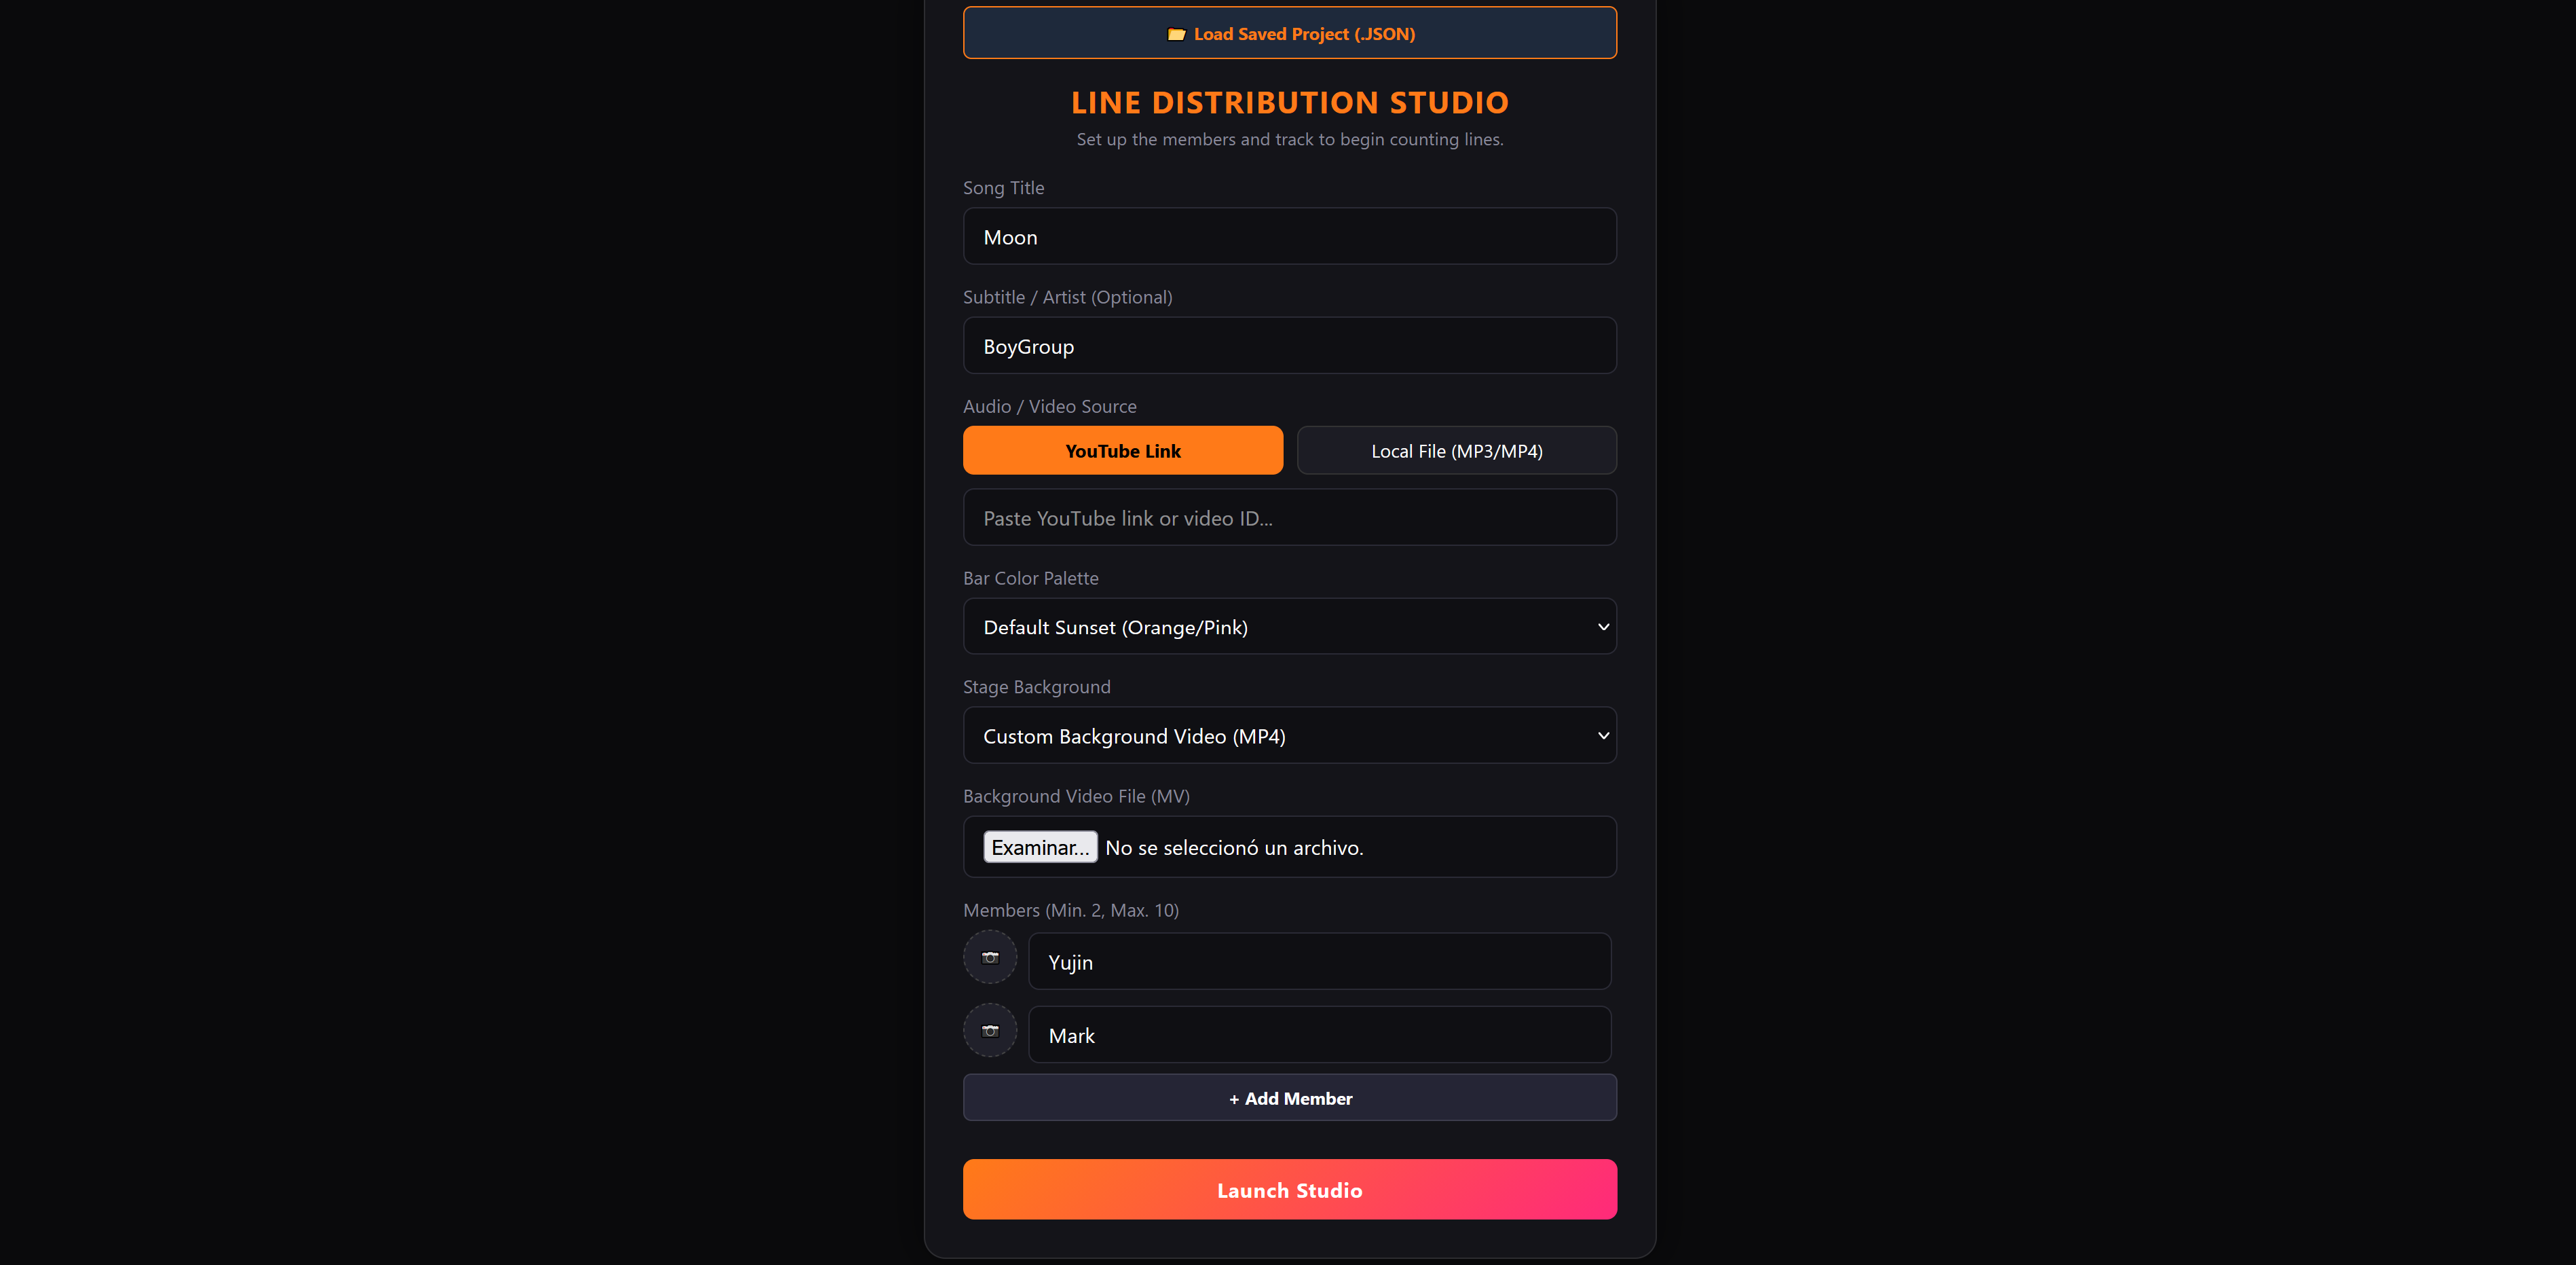
 [Image: Project Setup View]
Starting Your Line Distribution Project
When you enter the Line Distribution Studio, you will see the initial configuration screen. If you already have a saved project, you can easily load it via JSON files. When starting a fresh project, first type your song title, followed by the subtitle where the artist name typically goes. Next, specify your audio source: paste a YouTube link or choose a previously downloaded local audio/video file (we strongly recommend using local files for optimal responsiveness). Then, choose a color palette to customize the studio layout. Afterwards, select your stage background; downloading the track's music video (.mp4) produces a sleek, modern finish. Finally, configure your group members, upload their avatar photos, and click Launch Studio.
 [Image: Studio Settings & Action Buttons]
Optional Technical Settings & Navigation
Once inside the studio, handy utilities help streamline your workflow. If you forgot a setting or want to tweak member colors or media files, click the ⚙ Settings button to reconfigure any parameter. Use 🏠 Home to return to the hub. If you change your mind and prefer creating a color-coded video instead, click Open in Color Coded to transfer all project data with zero progress loss. Additionally, the ❓ Help button provides quick in-app reminders whenever needed.
Recording Line Distribution Timers
The core recording workflow is straightforward. Press Play on the built-in player. As a member begins singing, press their designated keyboard shortcut (A, S, D...) or click their on-screen button to trigger their vocal timer. Tap the same key again when their line ends. If you make a mistake or want to log overlapping vocals with two members singing simultaneously, you can rewind at any time and record over existing intervals. You have total freedom to record member by member or sequentially from start to finish.
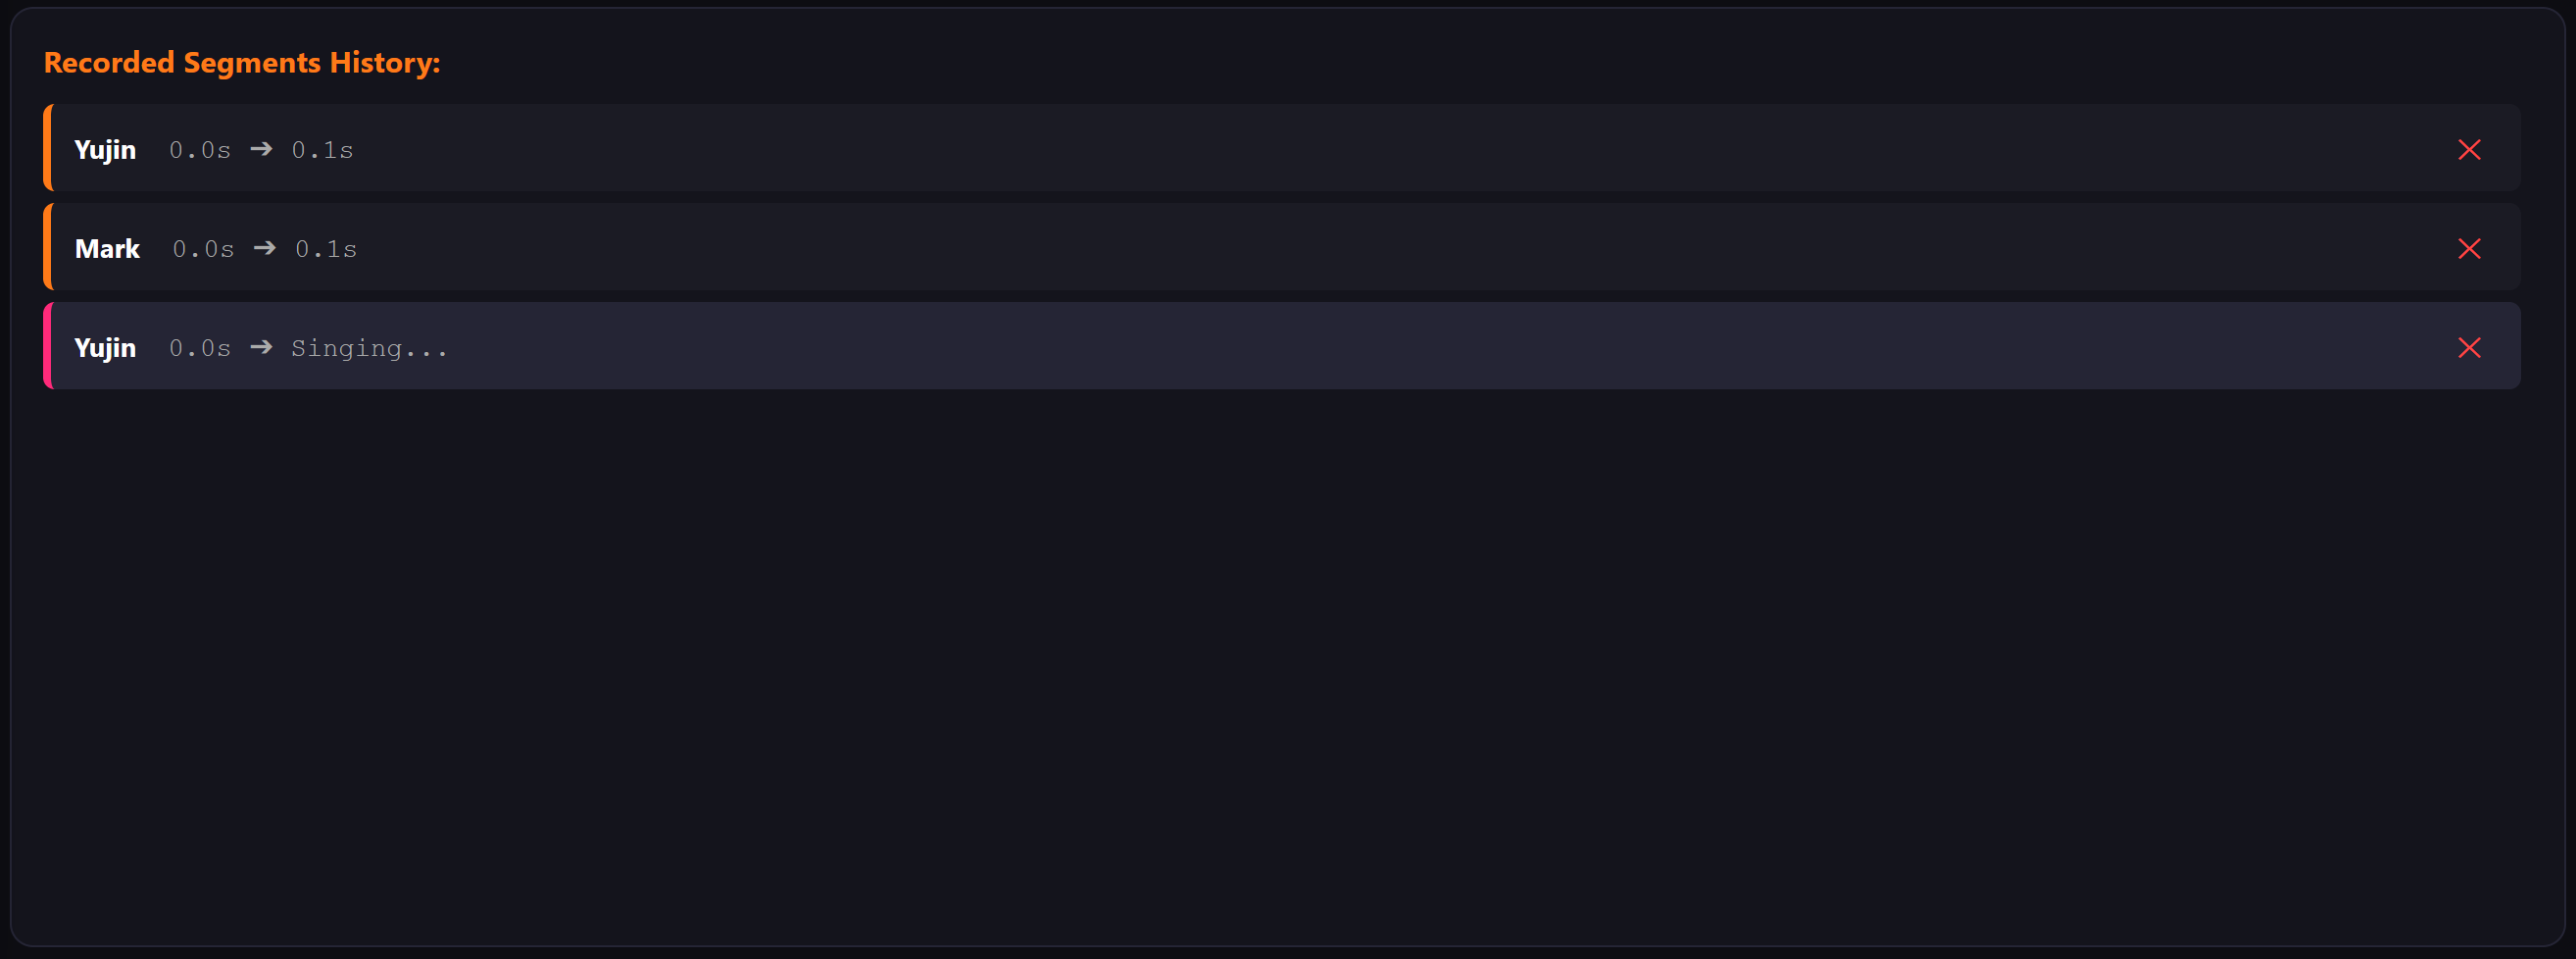 [Image: Segments History Timeline]
Recorded Segments History
As you log vocal segments, they populate the timeline list in the lower section of the studio. You can review exact start and end timestamps and delete individual segments with a single click if corrections are needed.
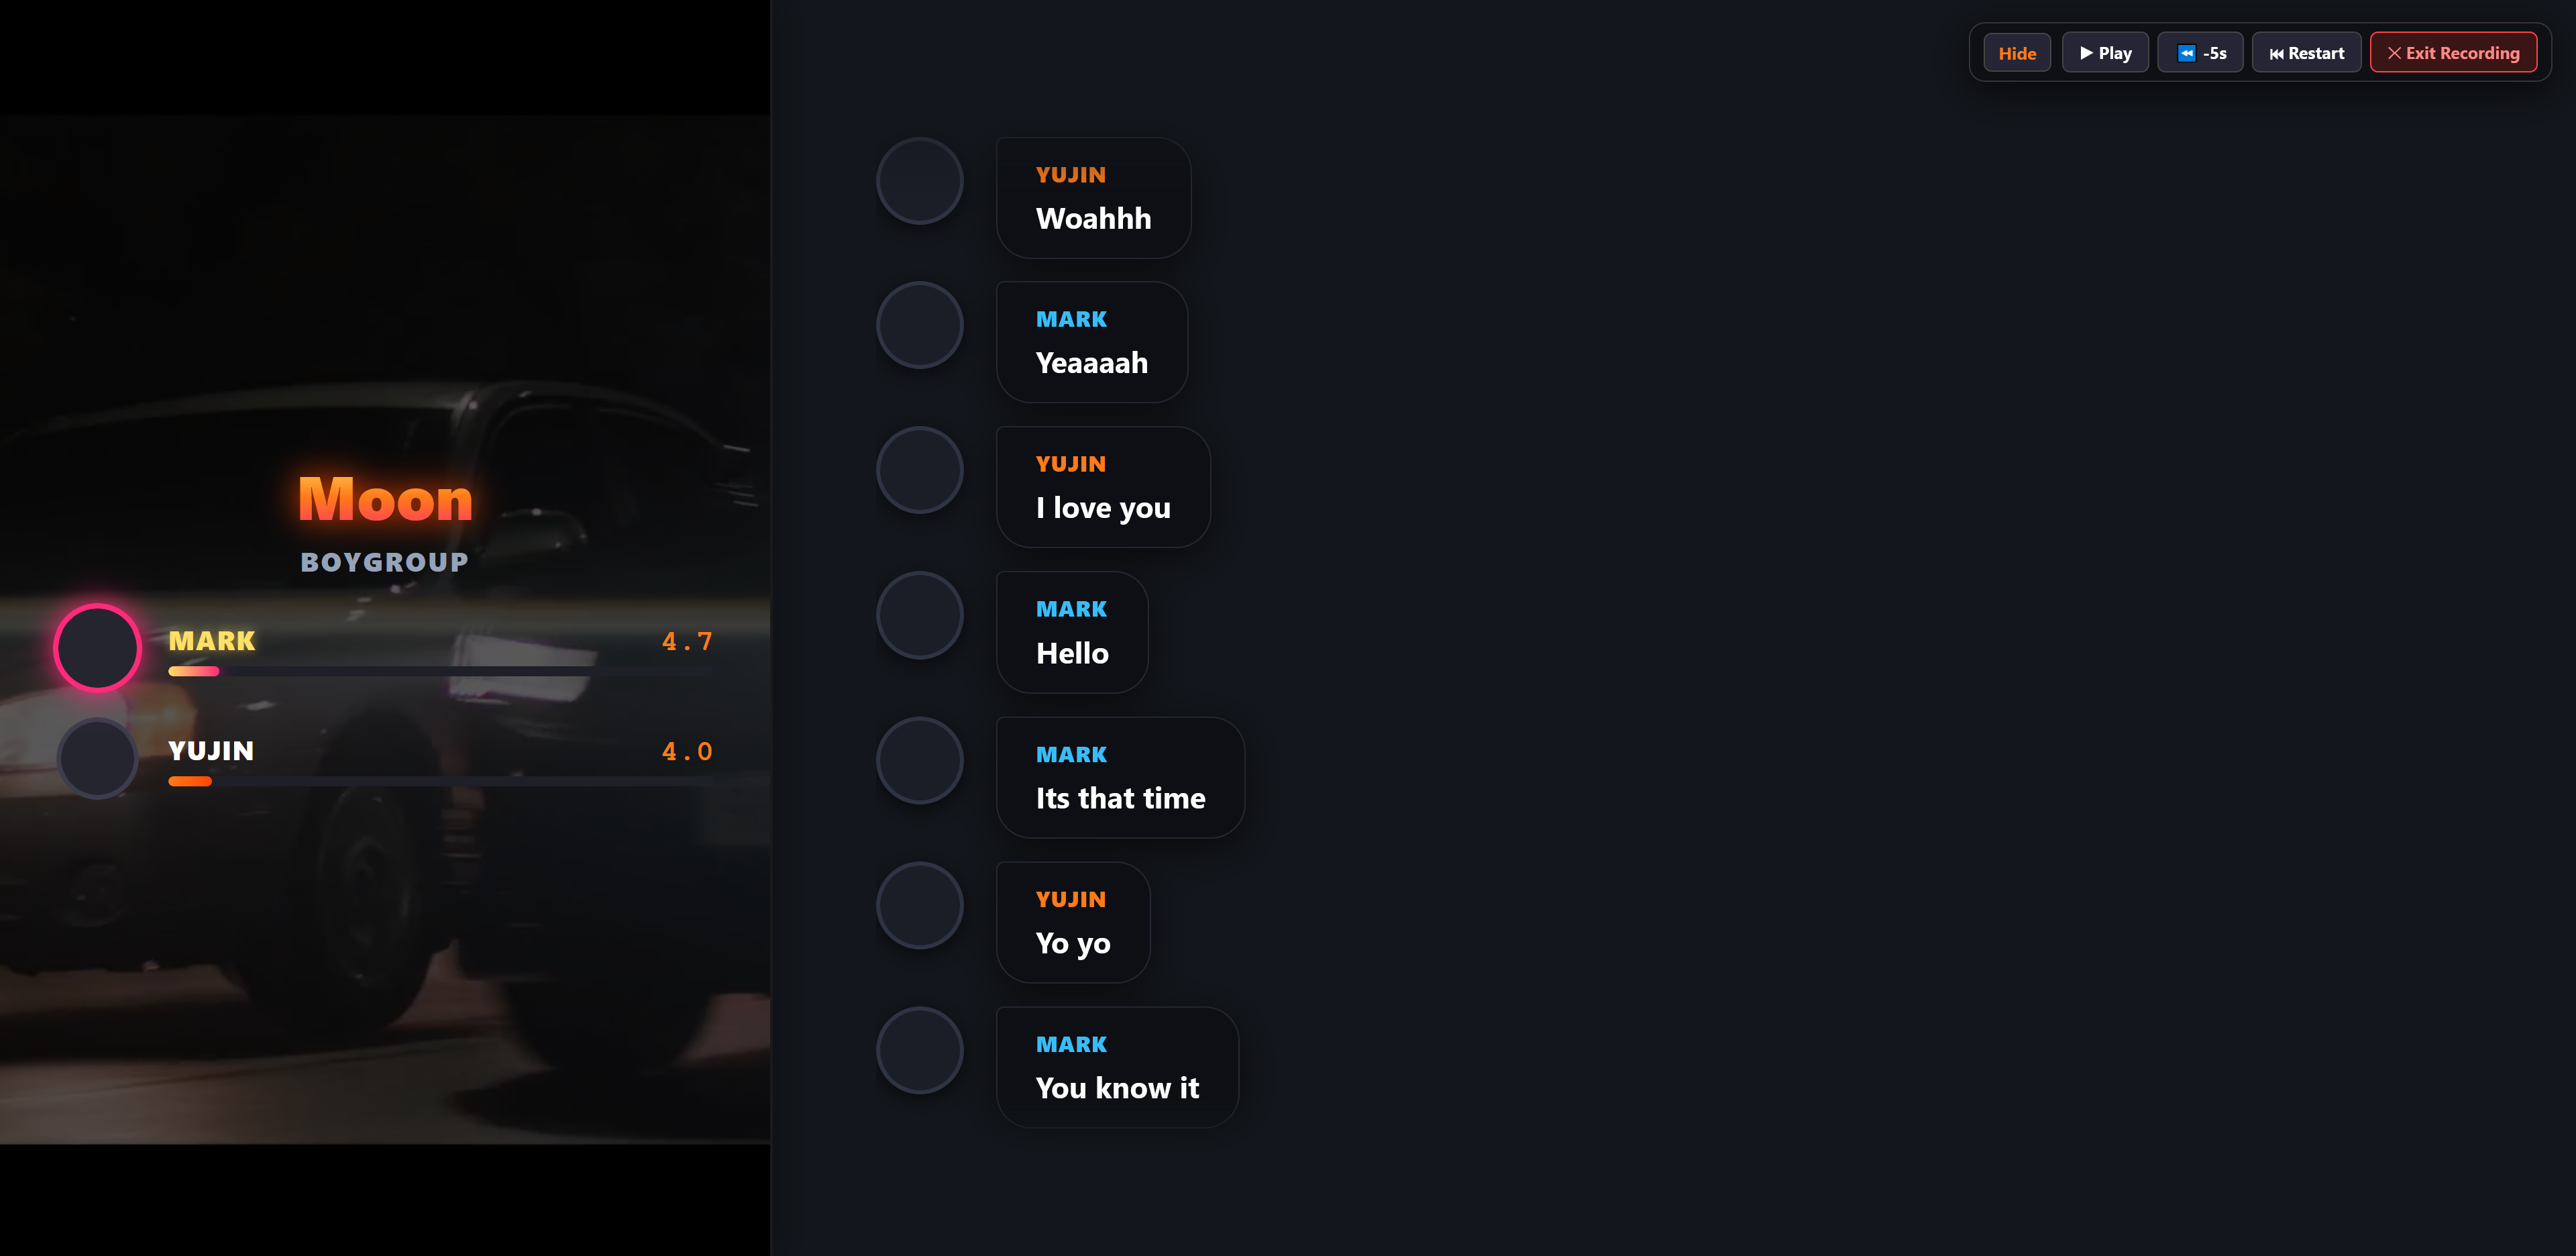 [Image: Clean 16:9 Stage Preview]
Previewing Stage Results
You can check your progress at any time by clicking 🎥 16:9 Recording (Shorts and Fullscreen views are also available). This enters a clean mode where real-time animated bars and active singer rankings are showcased.
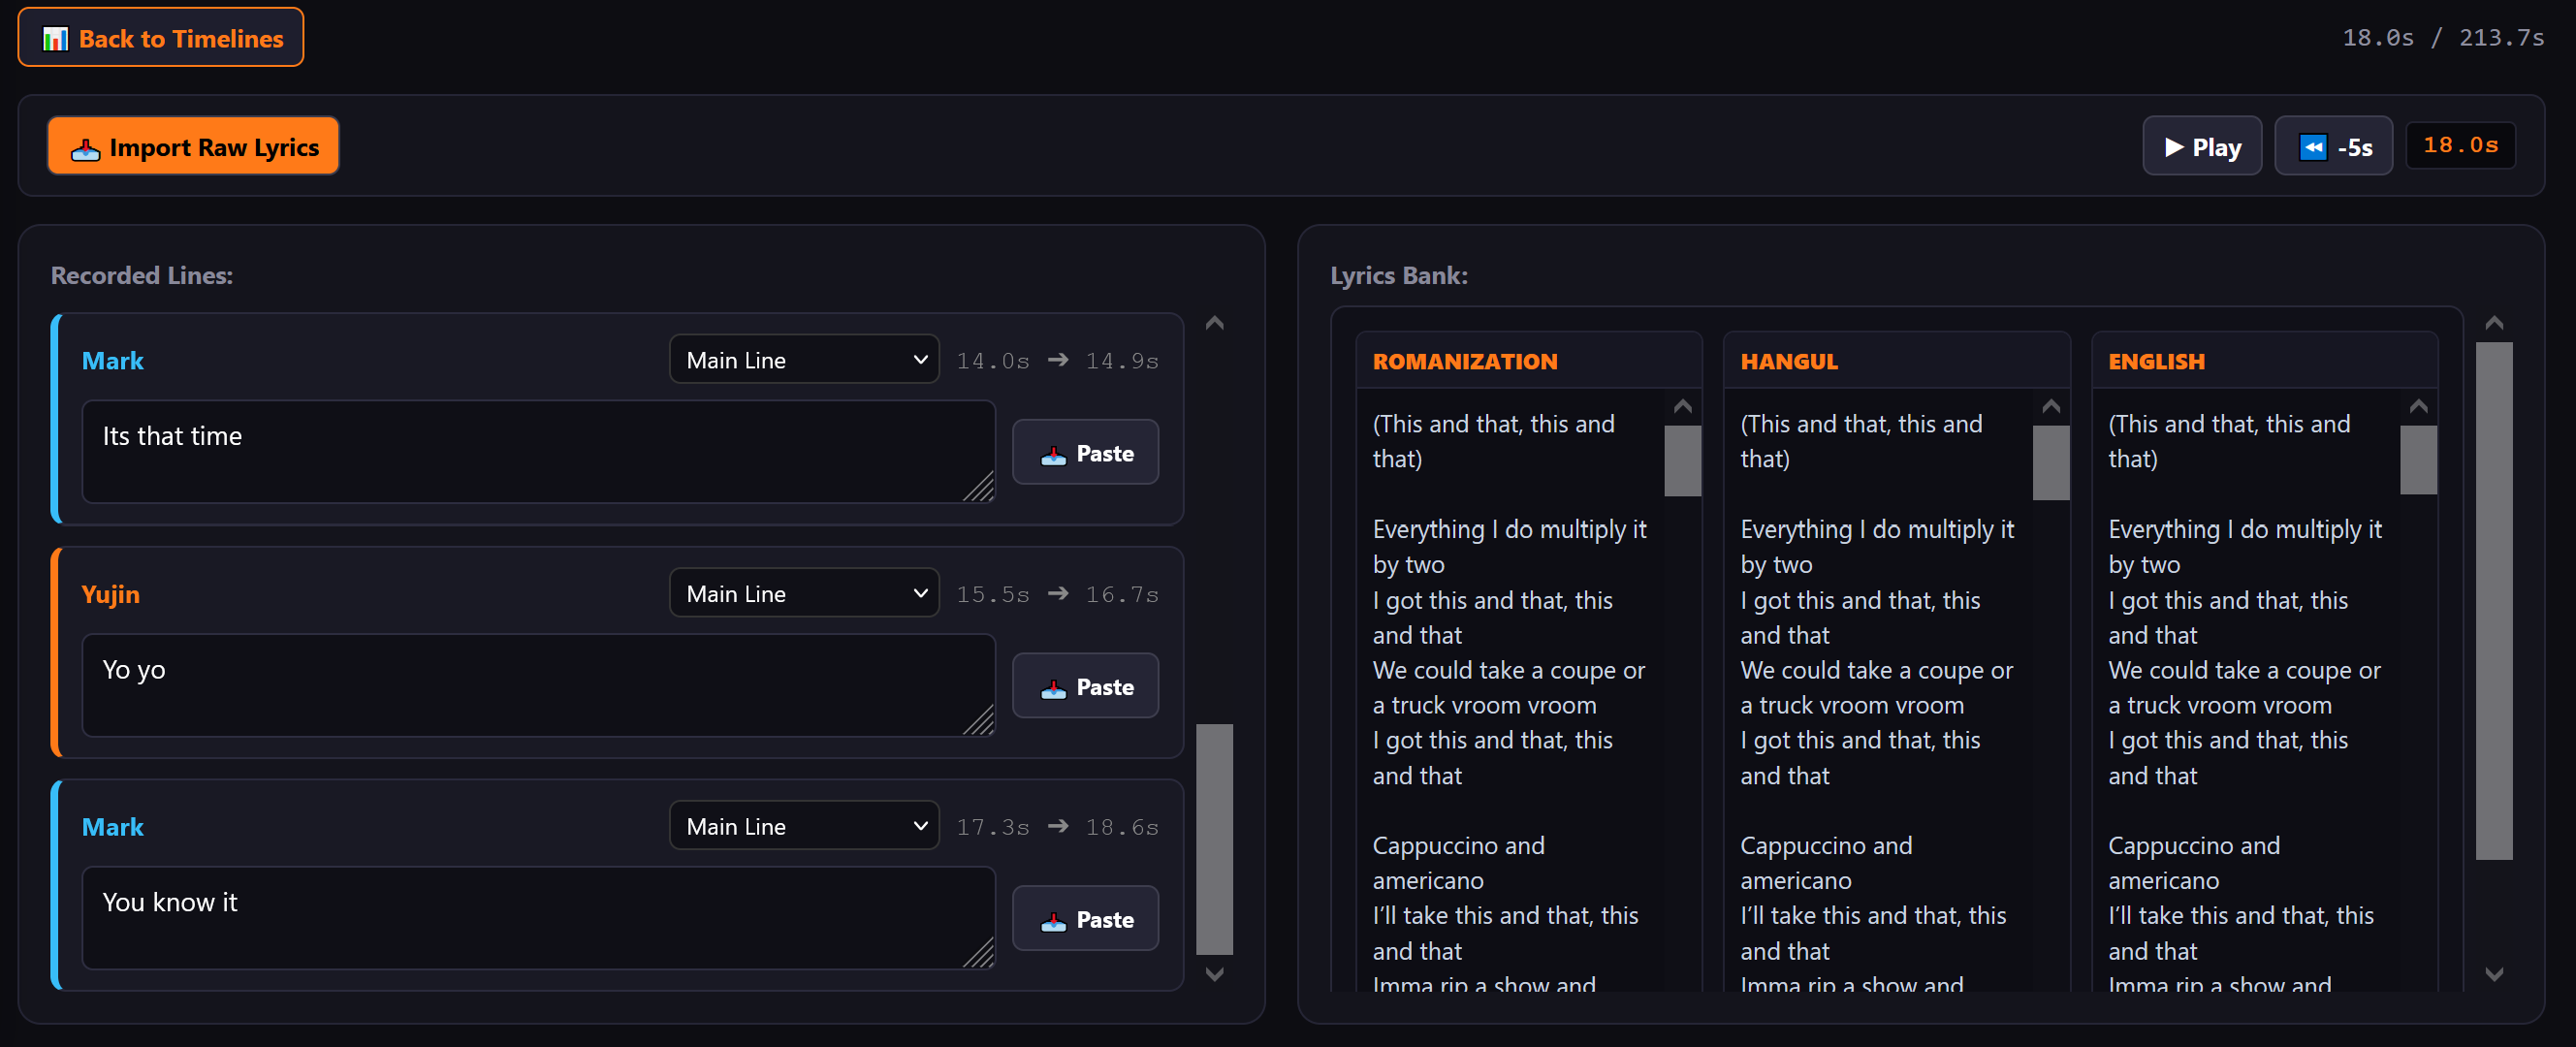 [Image: Lyrics Mode & Raw Parser]
Adding Lyrics to Your Track (Final Step)
Once your line timing is finalized, adding synced lyrics elevates your video to professional quality. Click the 📝 Lyrics Mode button on the sub-nav bar. This opens a dedicated workspace listing your recorded lines in order, each with a text input area ready for lyrics.
Instead of manually switching between tabs, click 📥 Import Raw Lyrics. You can paste formatted lyrics from popular websites like colorcodedlyrics.com (highly recommended if you wish to reference Hangul, Romanization, and English translations side-by-side) or member-structured lines from vockpopcclyrics.wordpress.com and smule.com. The parser organizes lyrics in the bank on the right, allowing you to copy and paste them directly into your lines with a single click.
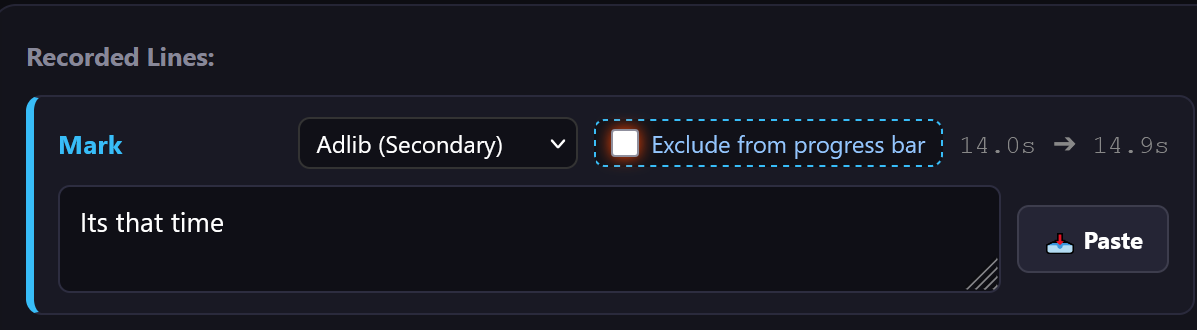 [Image: Secondary Adlib Toggles]
Adlibs & Secondary Vocals
You can designate any line as an Adlib (Secondary). Adlibs receive unique styling in the chat feed and allow you to toggle whether secondary background harmonies count toward the total progress bar time or remain strictly visual.
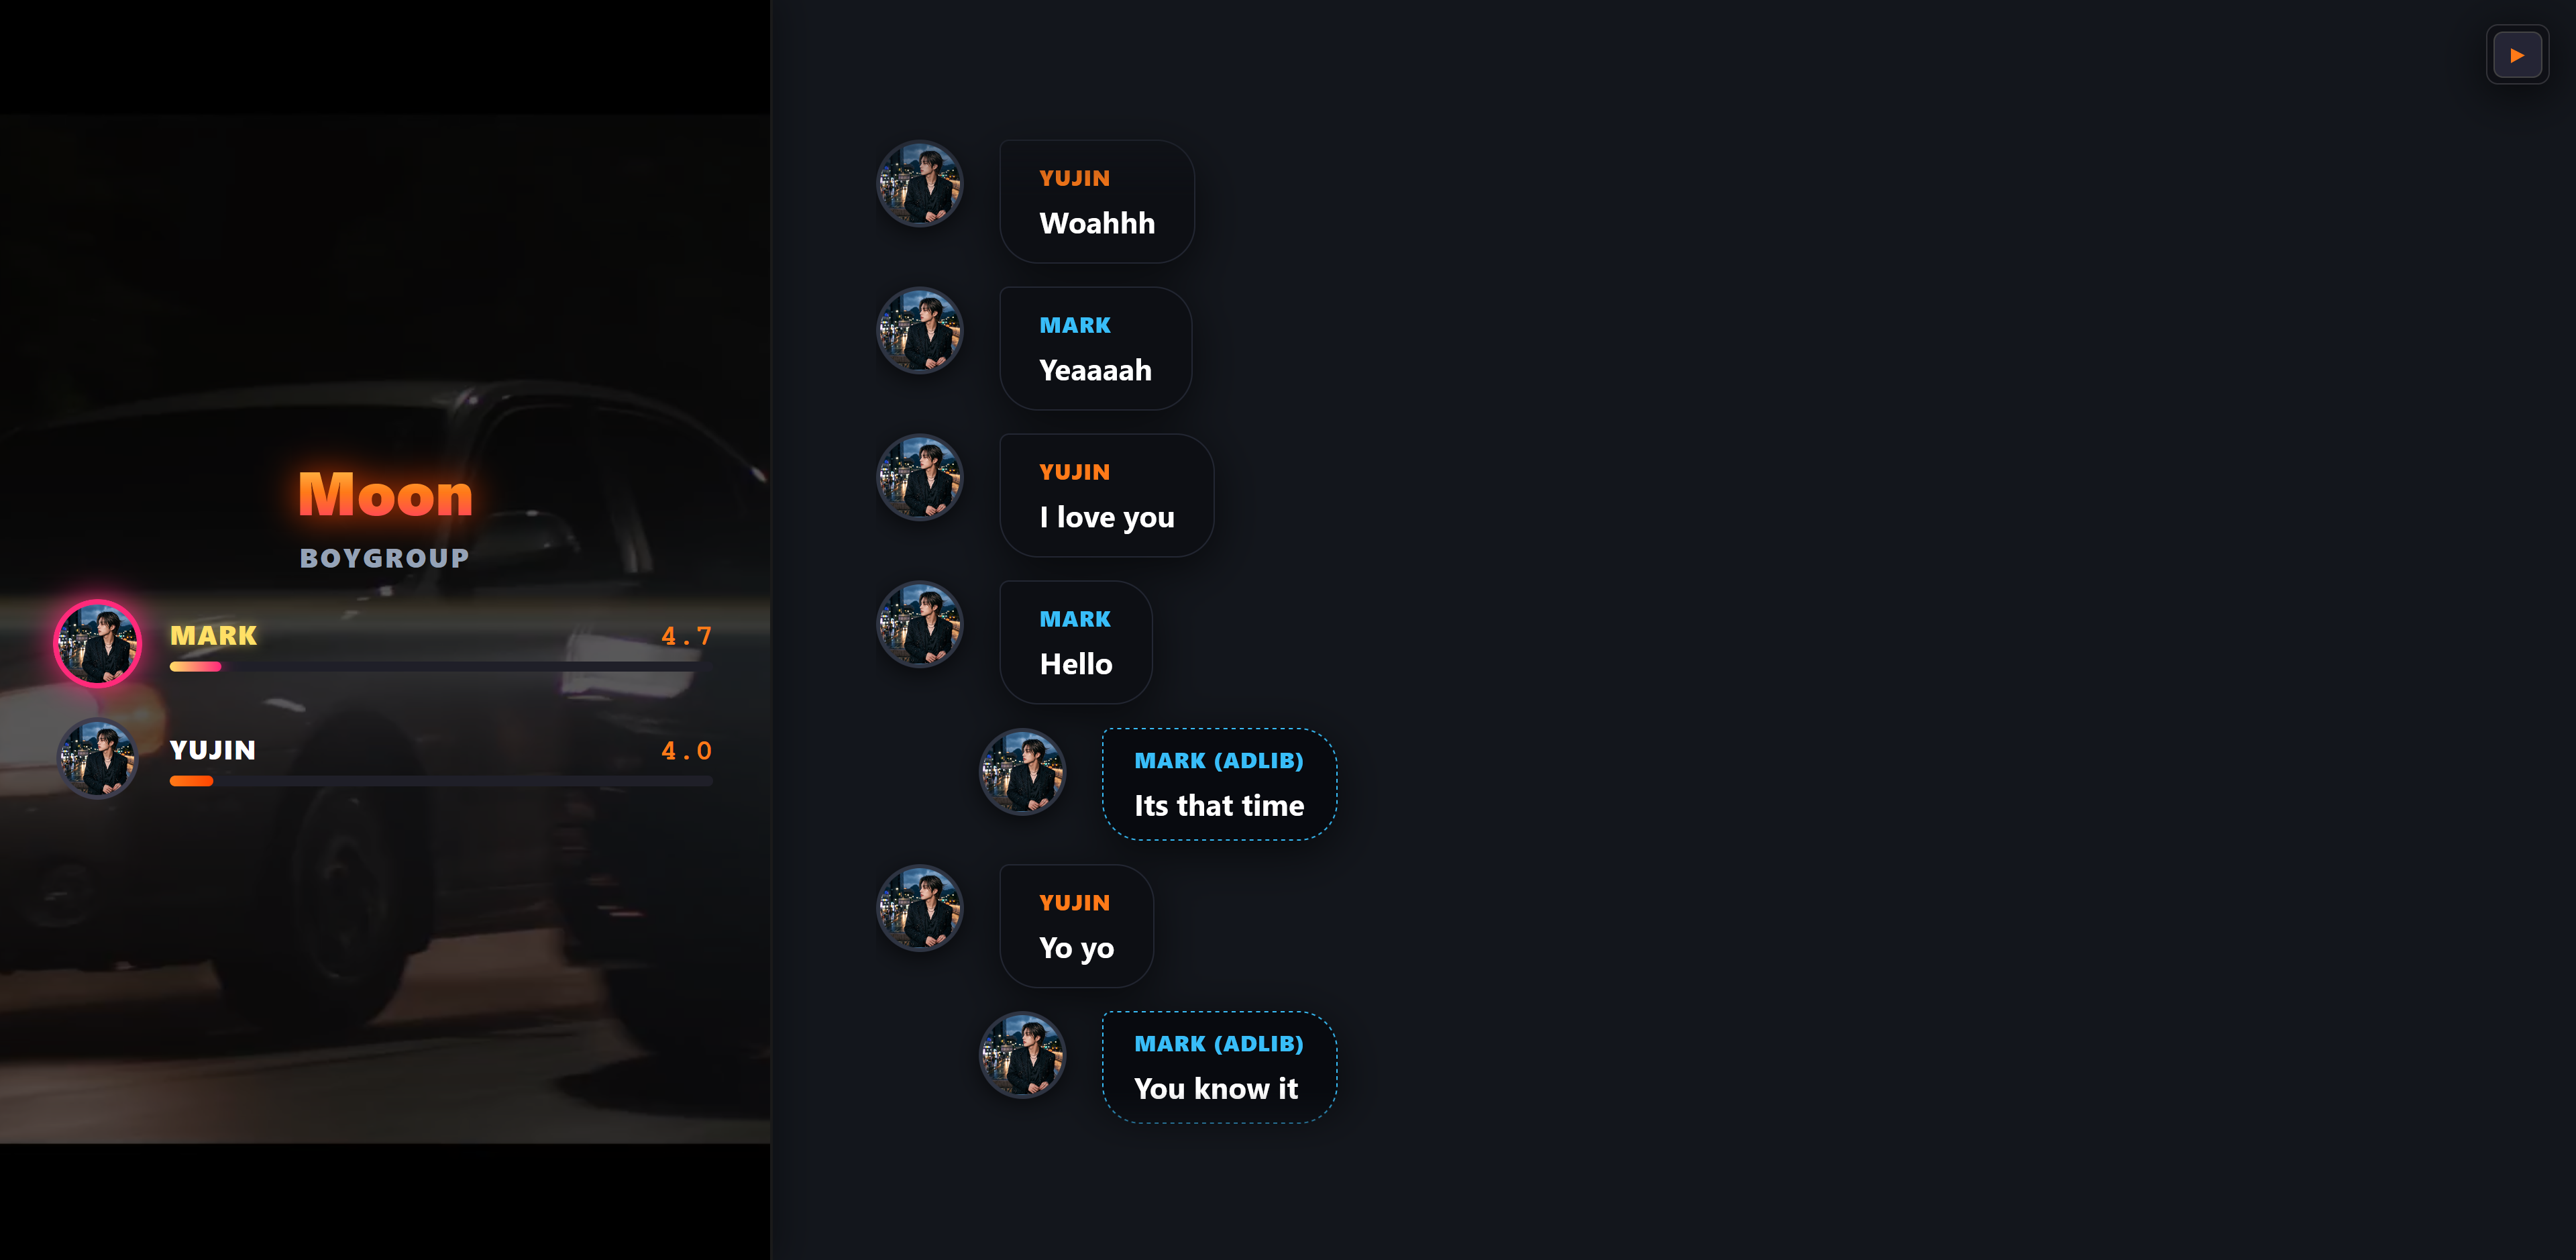 [Image: Final Screen Recording Layout]
Recording & Publishing Your Video
When your lines and lyrics are ready, enter 🎥 16:9 Recording Mode. All editing panels and controls hide automatically, displaying an uninterrupted layout with member bars on the left and a live chat lyrics feed on the right. Launch your screen recorder (such as OBS Studio or your system's game bar) to record your final video. As an added benefit, clicking Open in Color Coded will instantly generate an alternate color-coded version of the exact same song without requiring any extra editing!
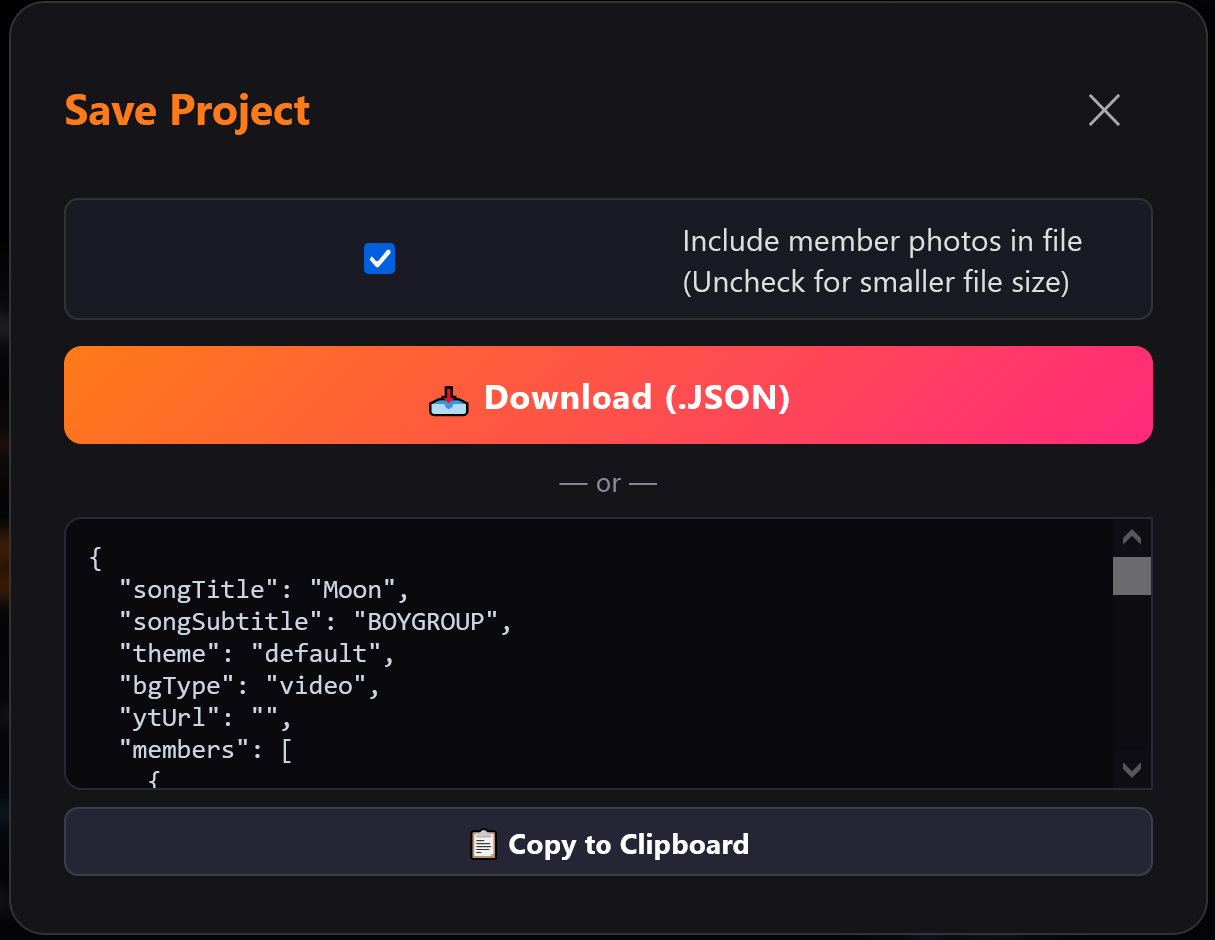 [Image: JSON Project Backup Modal]
Saving & Loading Projects
You can save your project at any moment via the 💾 Save button. We strongly advise downloading the generated .json file to your computer, though you can also copy the raw JSON text directly to your clipboard. When returning to work later, you can upload the file or paste the code to resume where you left off. Project files are completely cross-compatible between Line Distribution and Color Coded modes.
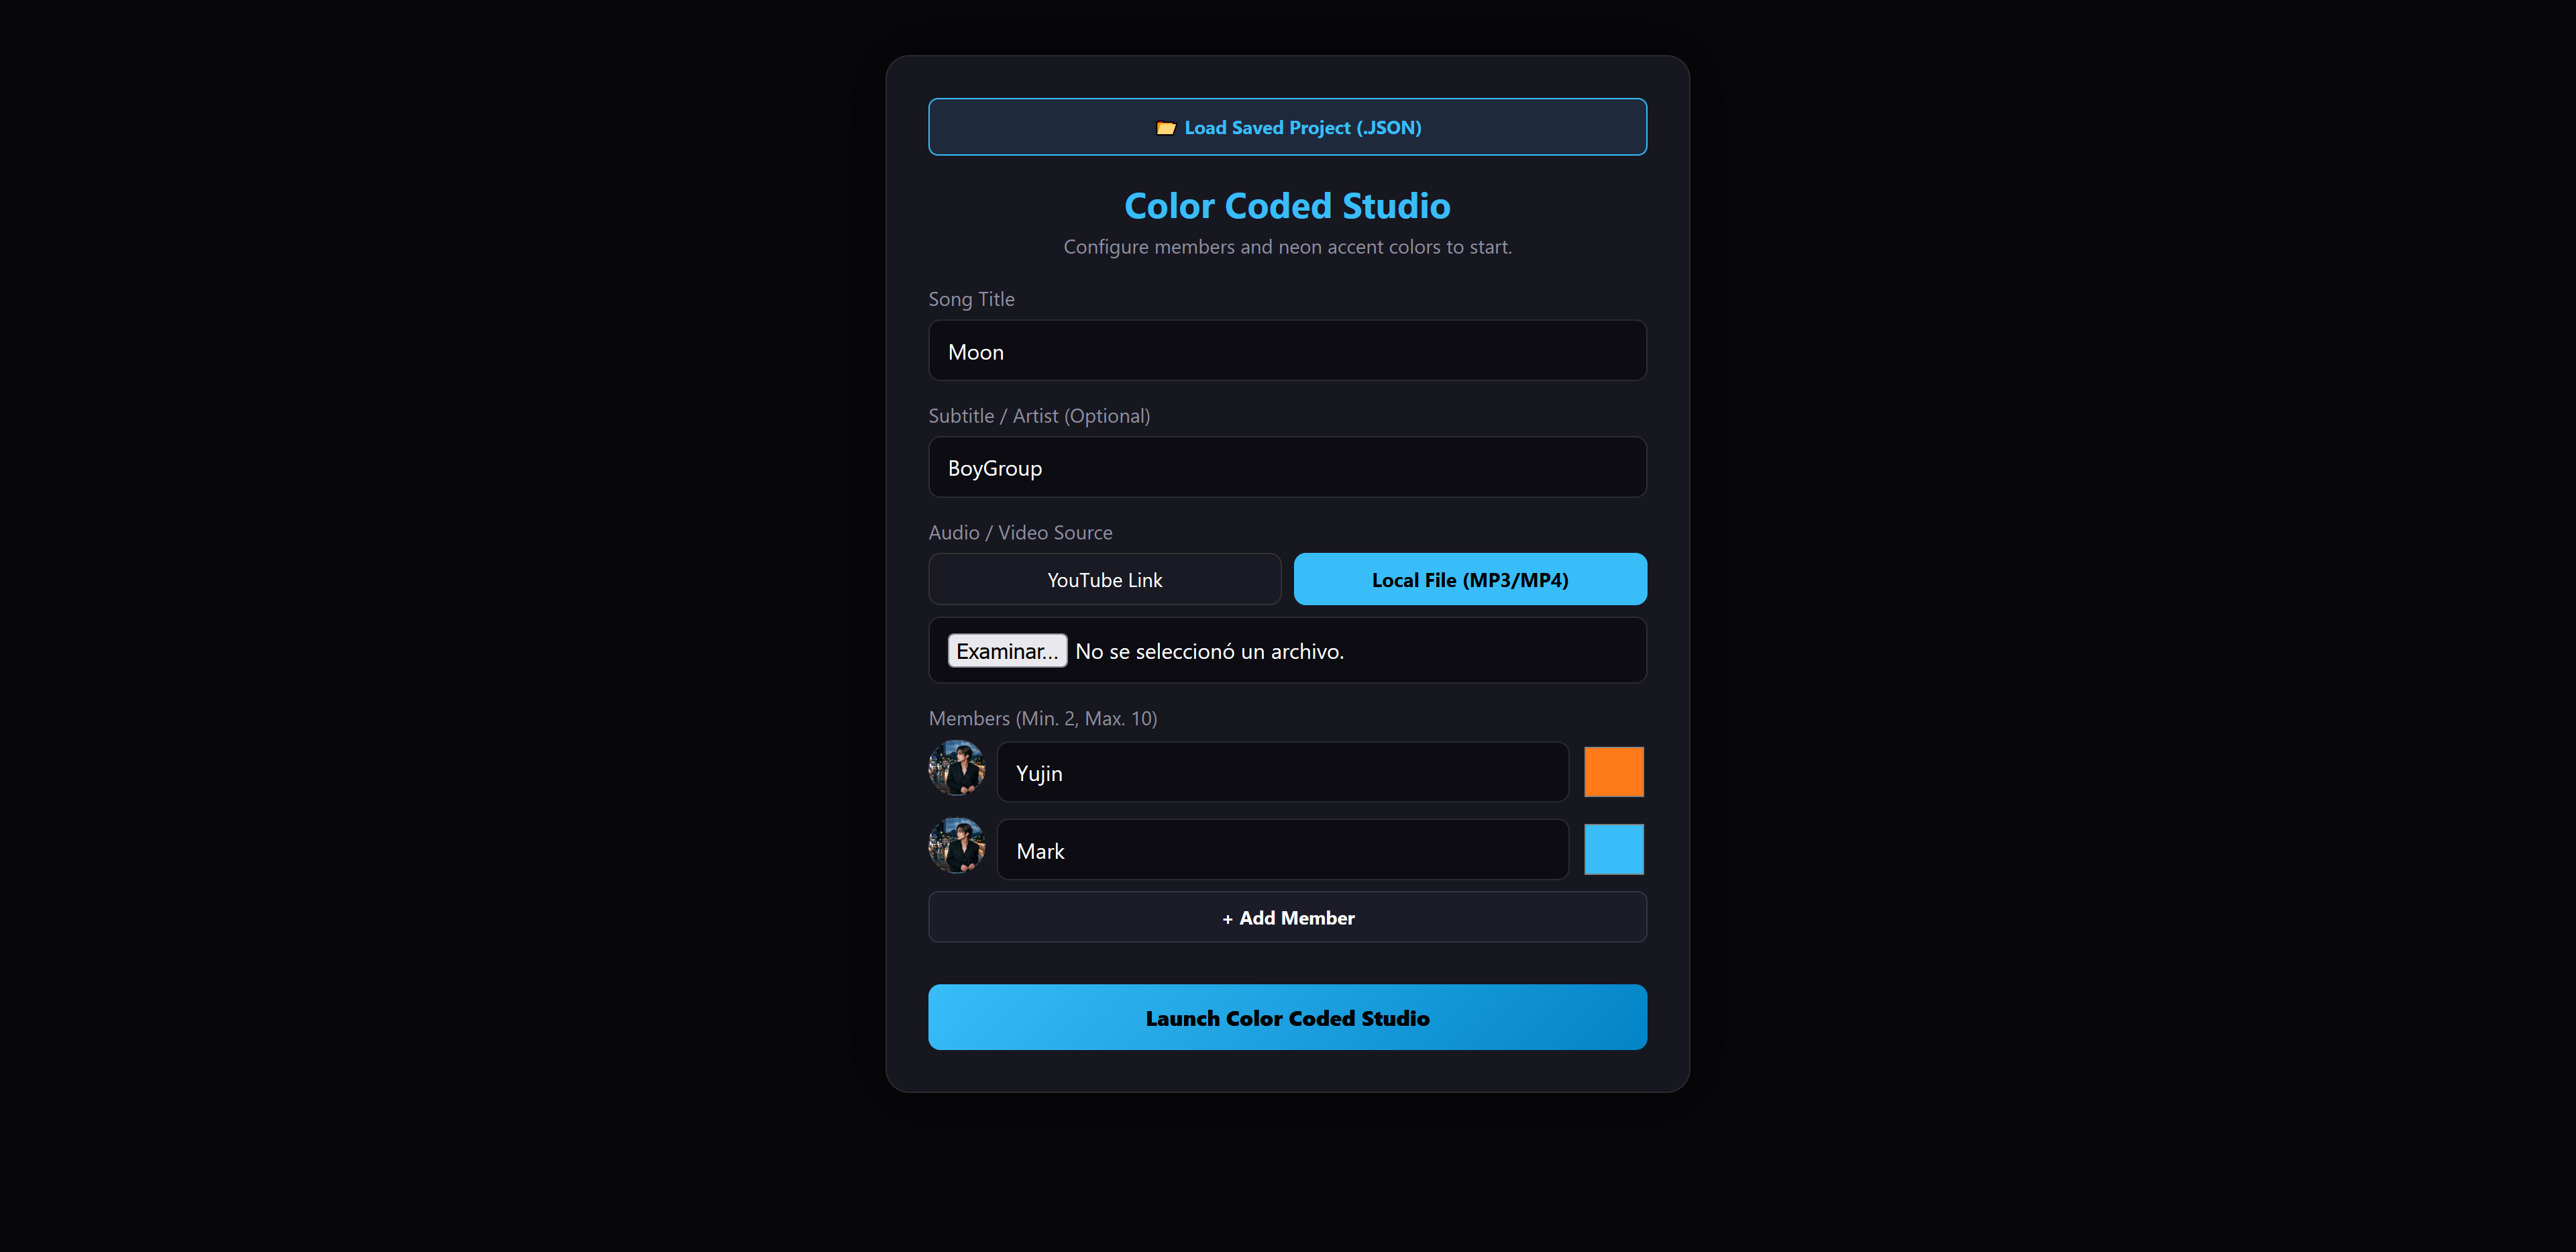 [Image: Color Coded Setup View]
Starting Your Color Coded Project
When entering the Color Coded Studio, you will be greeted by the initial configuration screen. If you already have a saved project, you can load it using a JSON file. If you are starting fresh, begin by entering the song title, followed by the subtitle where the artist or group name usually goes. Next, specify your audio source by pasting a YouTube link or selecting a previously downloaded local audio/video file (we strongly recommend local files for maximum playback stability). Then, customize the neon color accents that will decorate the studio layout. Finally, add your group members, upload their avatar photos, choose their unique member colors, and click Launch Color Coded Studio.
 [Image: Settings & Action Controls]
Optional Technical Settings & Navigation
Once inside the studio, convenient utility buttons help manage your workspace. If you need to modify settings, artist info, or member colors, click the ⚙ Settings button to reconfigure any aspect of your project. If you wish to exit, click 🏠 Home. If you want to switch formats, clicking Open in Line Distribution takes you directly to the Line Distribution Studio with all your timestamps, lines, and member assets preserved. For quick reference during recording, the ❓ Help button opens a concise in-app guide.
Creating Your Color Coded Video
The workflow is simple and intuitive. Press Play on the transport bar. Whenever a member sings, press their corresponding keyboard shortcut (A, S, D...) or click their top photocard card directly. Once their vocal part finishes, press the same key again to close the line. If you make a mistake or want to log overlapping voices, rewind the track and record another member over the previous one. You can record section by section or member by member with total flexibility.
 [Image: Event Lines List]
Recorded Lines Editor
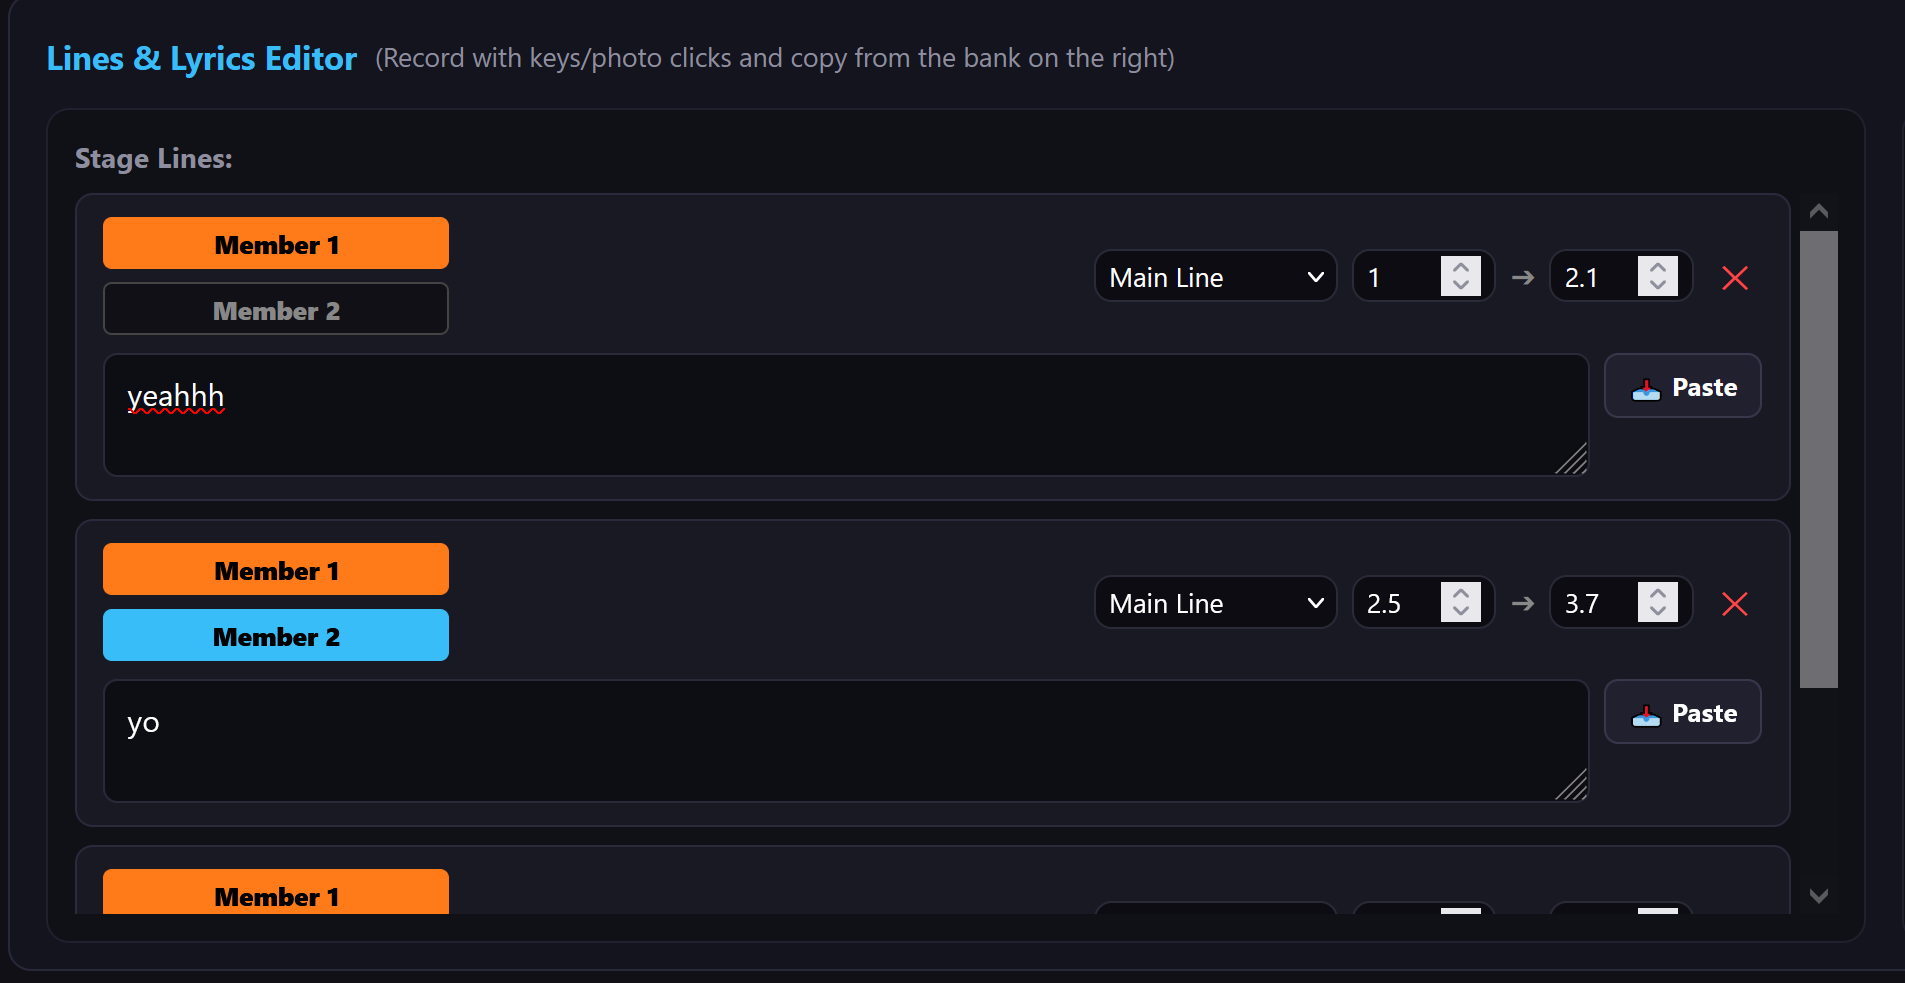
As you log singing intervals, each line appears in the editor panel below. You can inspect exact start and end timestamps or delete individual lines. Member chips also appear on each card, letting you select two or more vocalists simultaneously to unlock automated multi-color gradient typography during playback.
 [Image: Clean 16:9 Stage Preview]
Previewing Your Stage
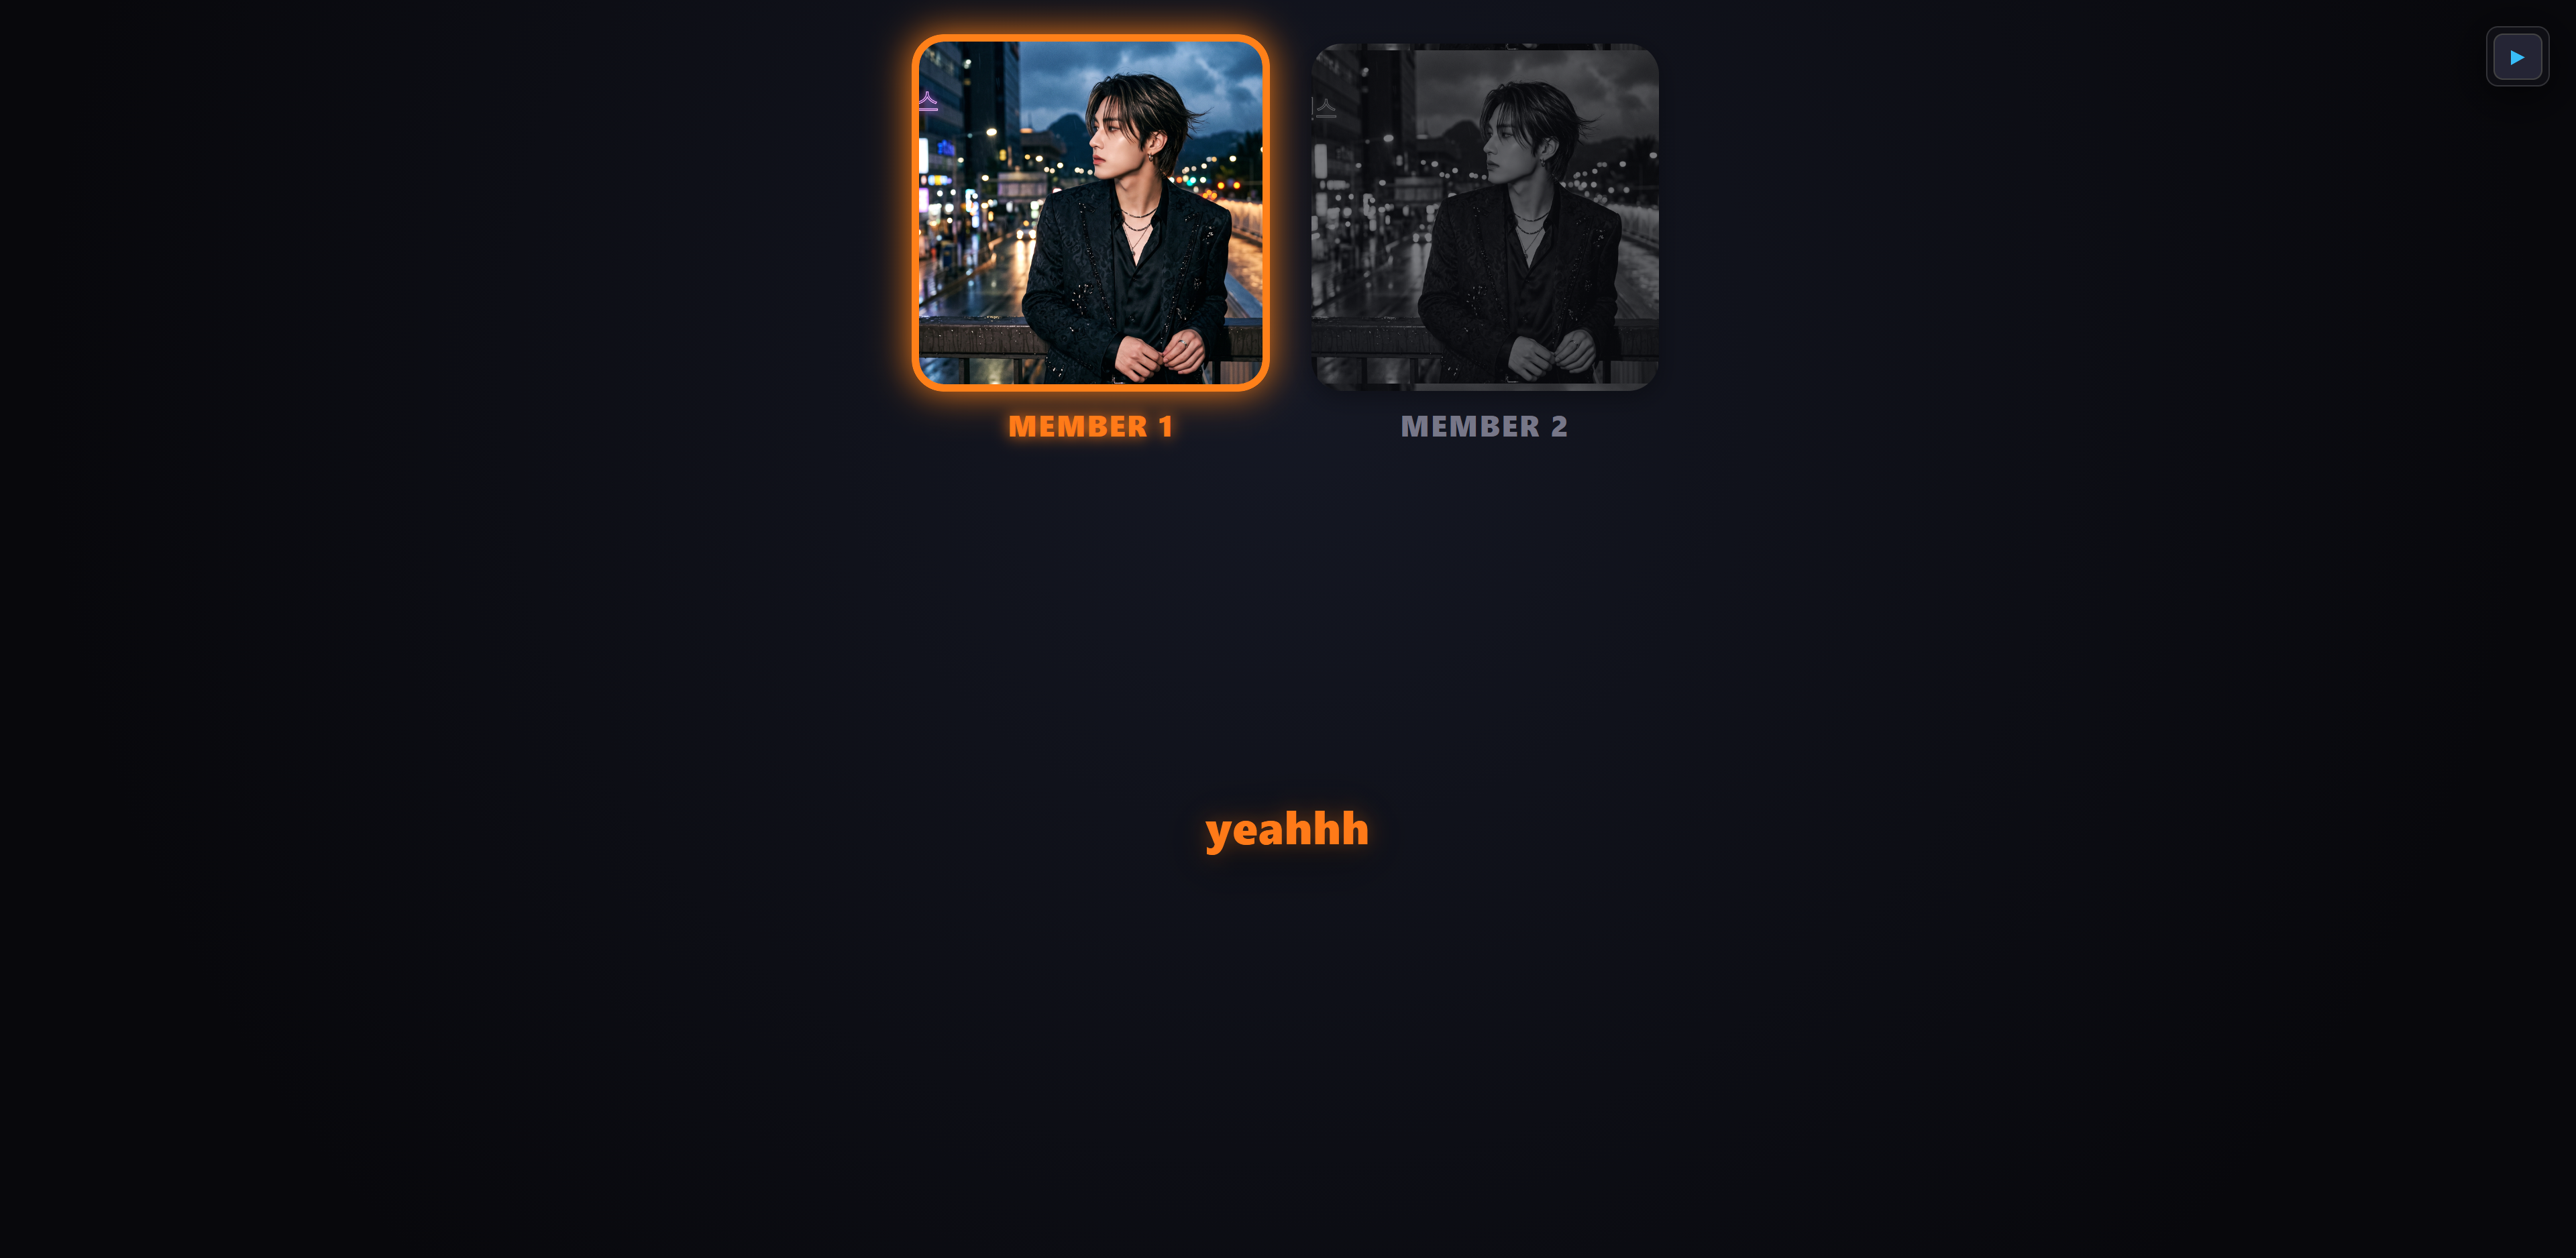
You can check your progress at any time by clicking 🎥 16:9 Recording Mode (Clean). This presents a clean, distraction-free stage with real-time neon highlights. Next, all that is left is adding the lyrics.
 [Image: Lyrics Import & Editor]
Adding Lyrics (Final Step)
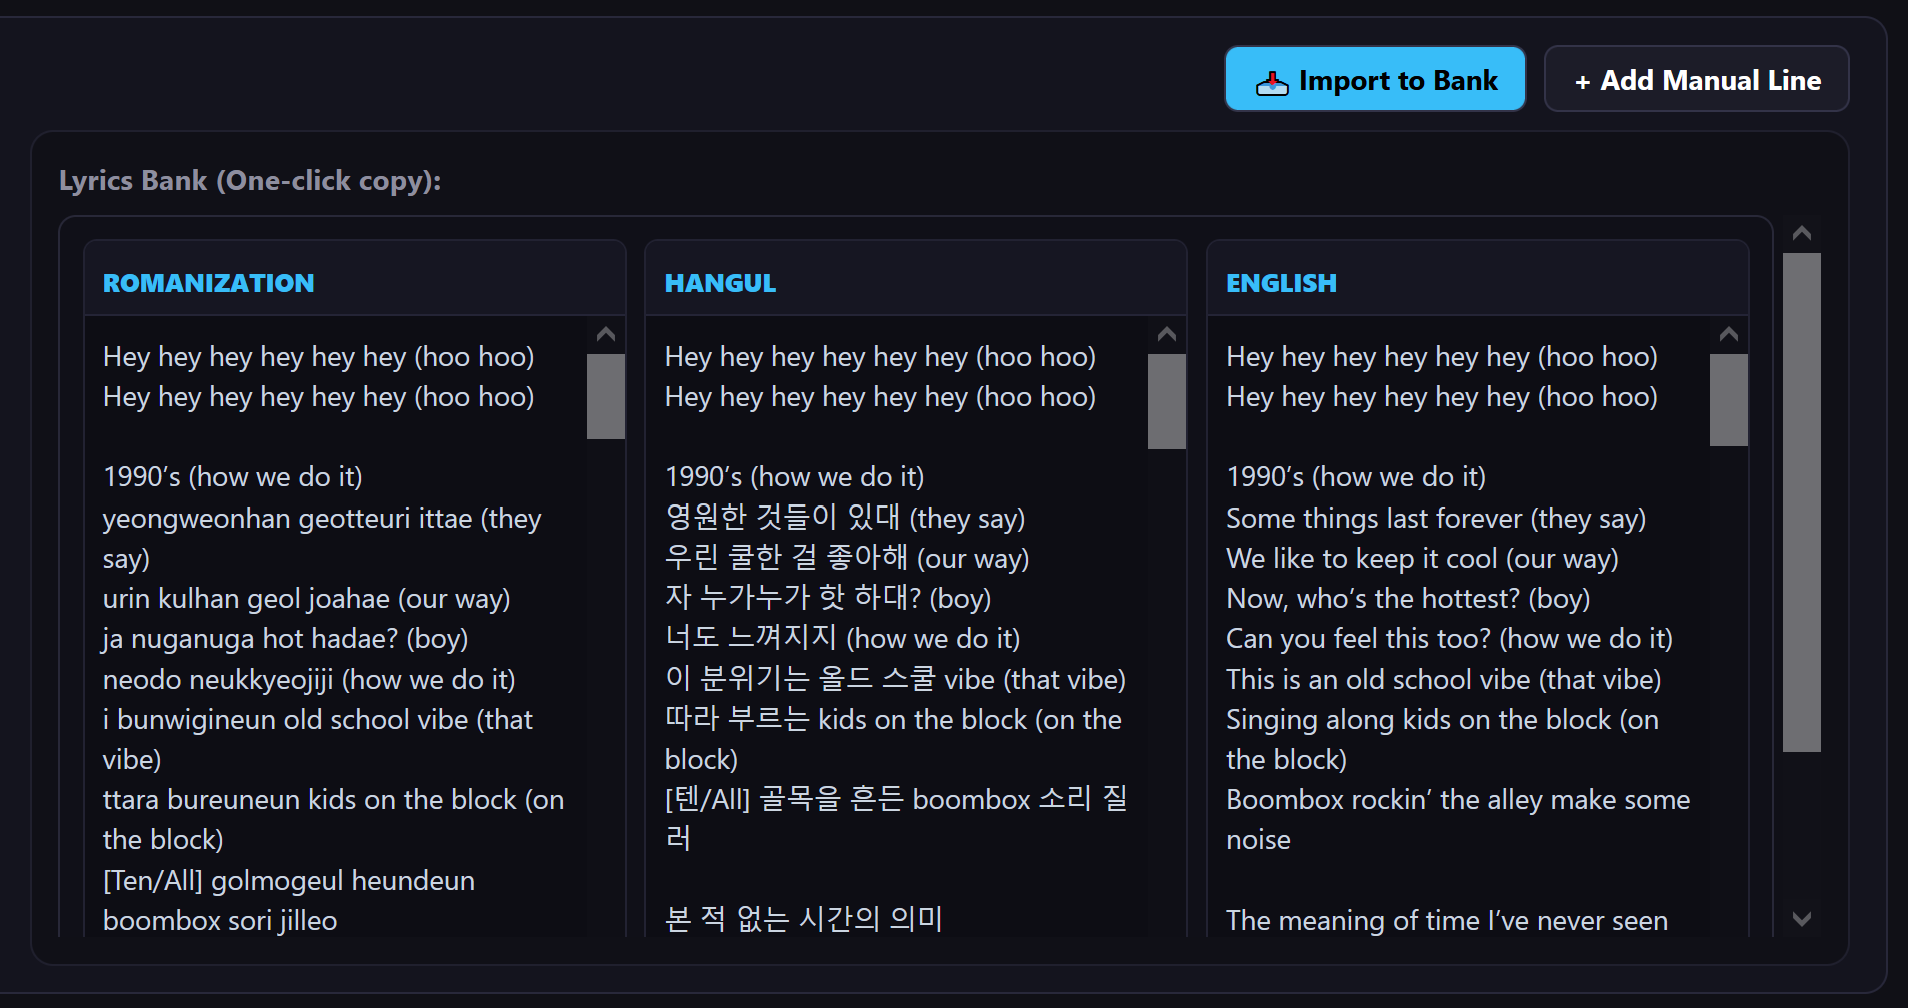
Once your lines are timed, paste the corresponding lyrics into each line card. To speed up your workflow without switching tabs back and forth, click the 📥 Import to Bank button. This opens a modal where you can paste raw lyrics from popular sources like colorcodedlyrics.com (ideal for side-by-side Hangul, Romanization, and English translation columns) or line-by-line formatted sources like vockpopcclyrics.wordpress.com and smule.com. Blocks are neatly organized in the bank on the right, ready to copy and paste into your stage lines with a single click.
 [Image: Dedicated Adlib Line Display]
Dedicated Adlibs & Secondary Lines
Whenever appropriate, you can classify any line as an Adlib (Dedicated). Secondary vocals receive distinct styling and display in parentheses within the dedicated upper area, ensuring backing vocals never cover or conflict with the main lyrics.
 [Image: Clean 16:9 Recording View]
Recording & Publishing Your Video
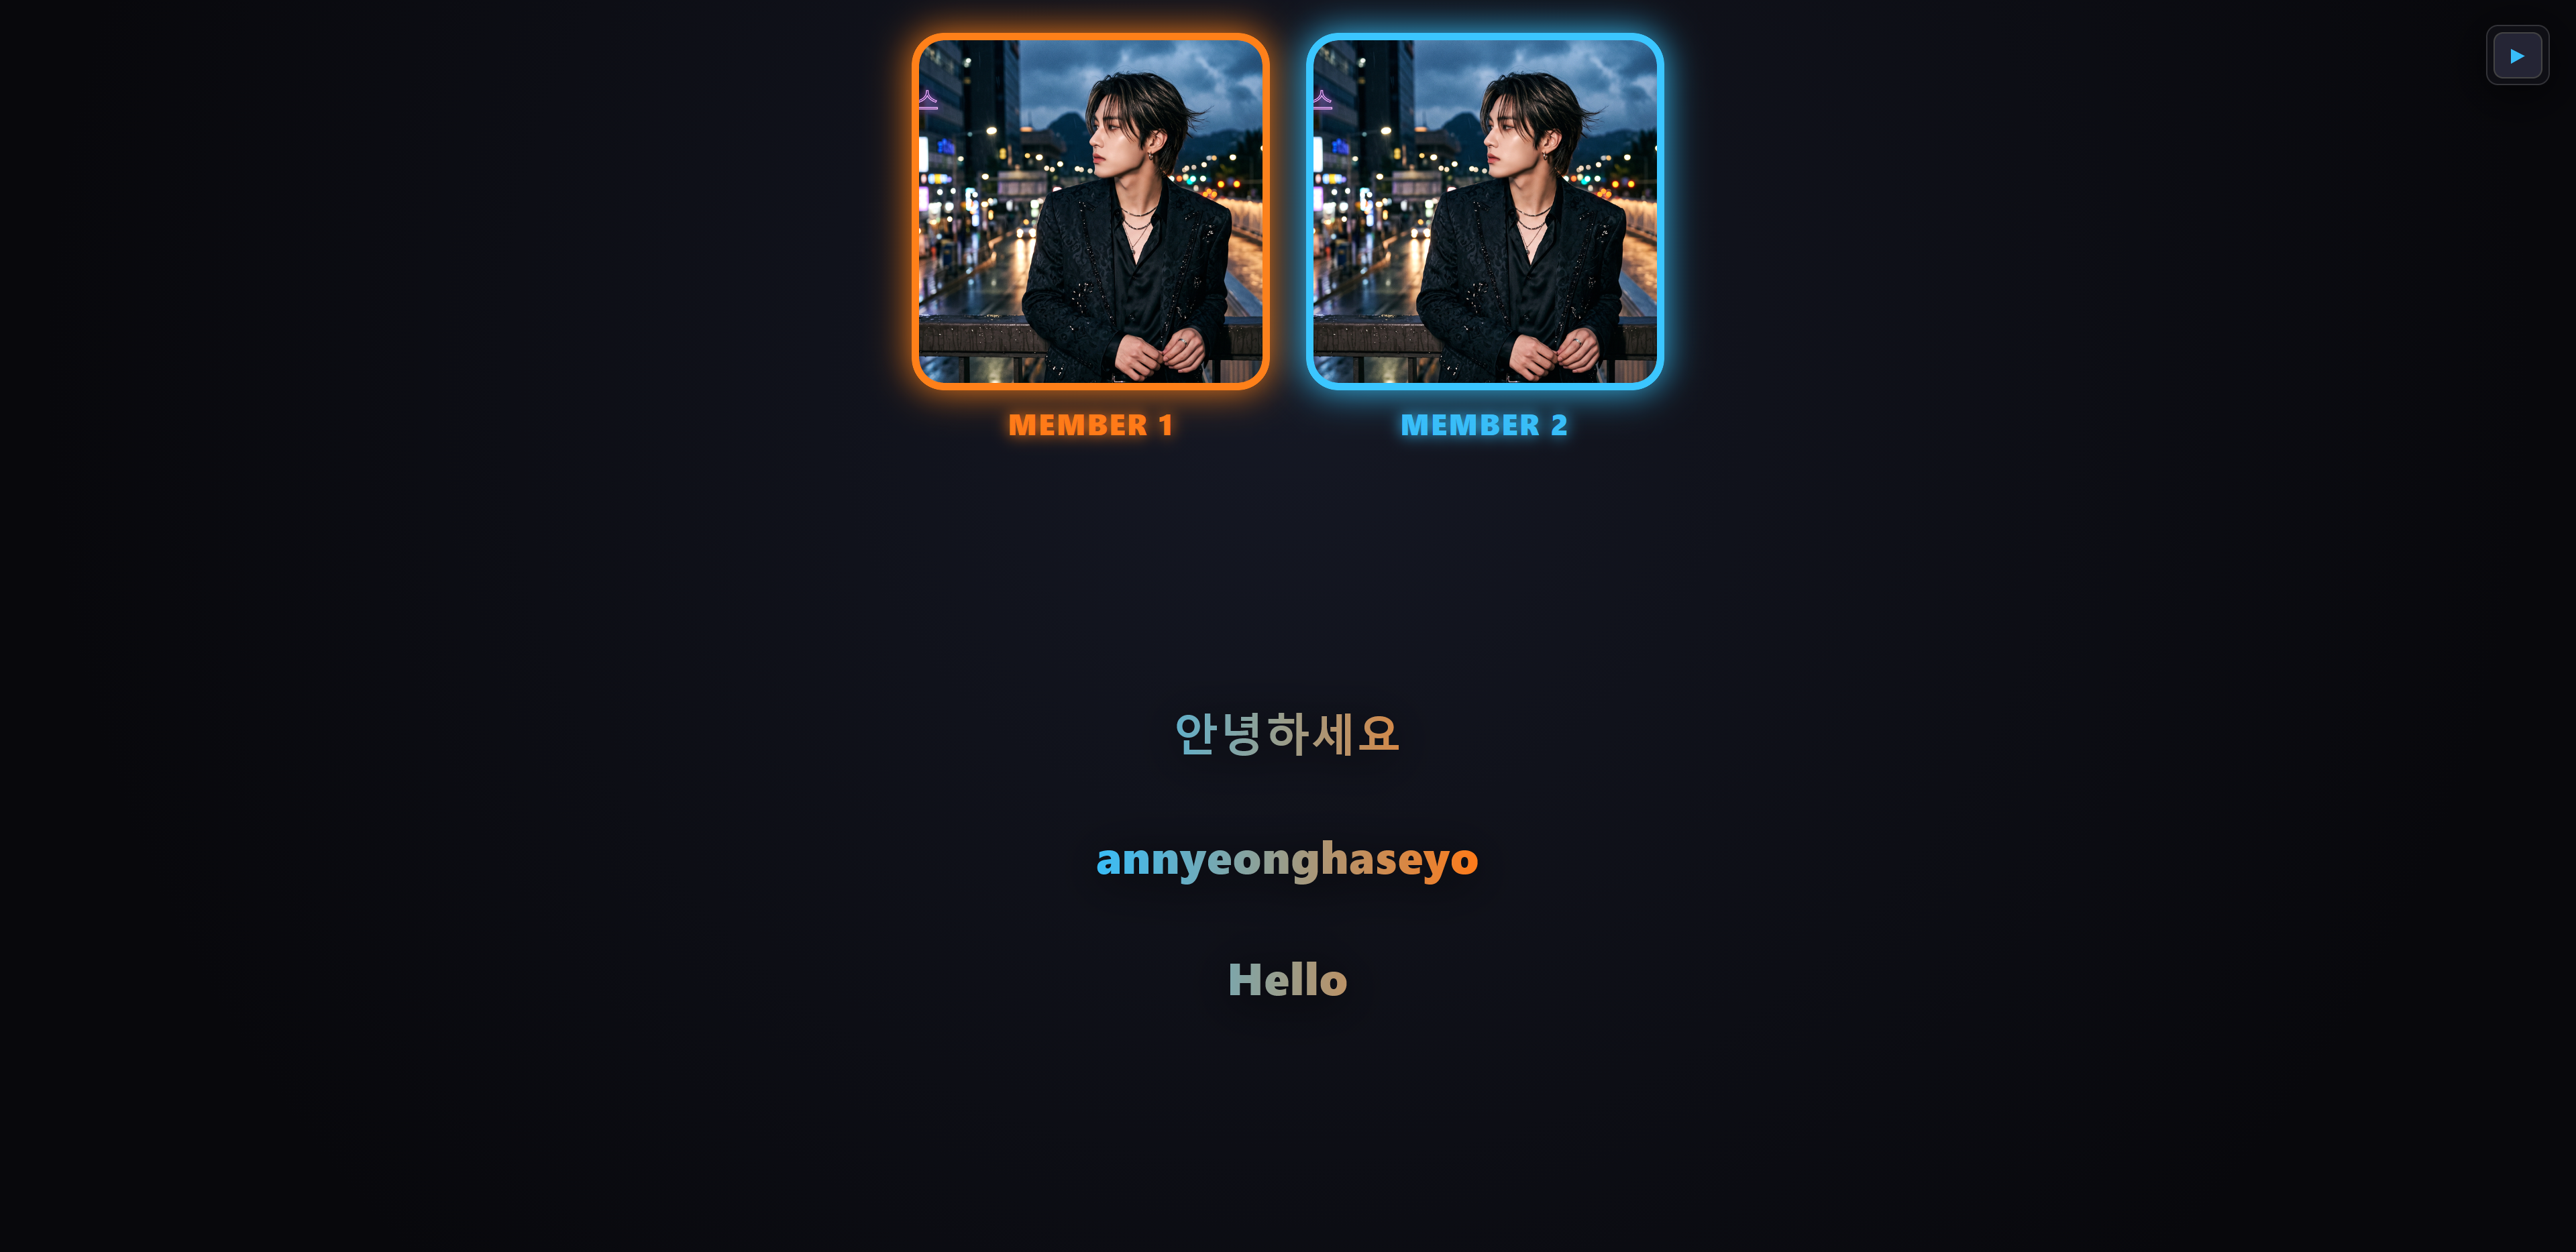
When everything is synchronized, click 🎥 16:9 Recording Mode (Clean). This hides all menus and editor tools, leaving a clean full-screen stage ready for capture using OBS Studio or your preferred screen recording software. Additionally, clicking 🔄 Open in Line Distribution instantly converts the exact same project into a Line Distribution video with ranking bars without starting over!
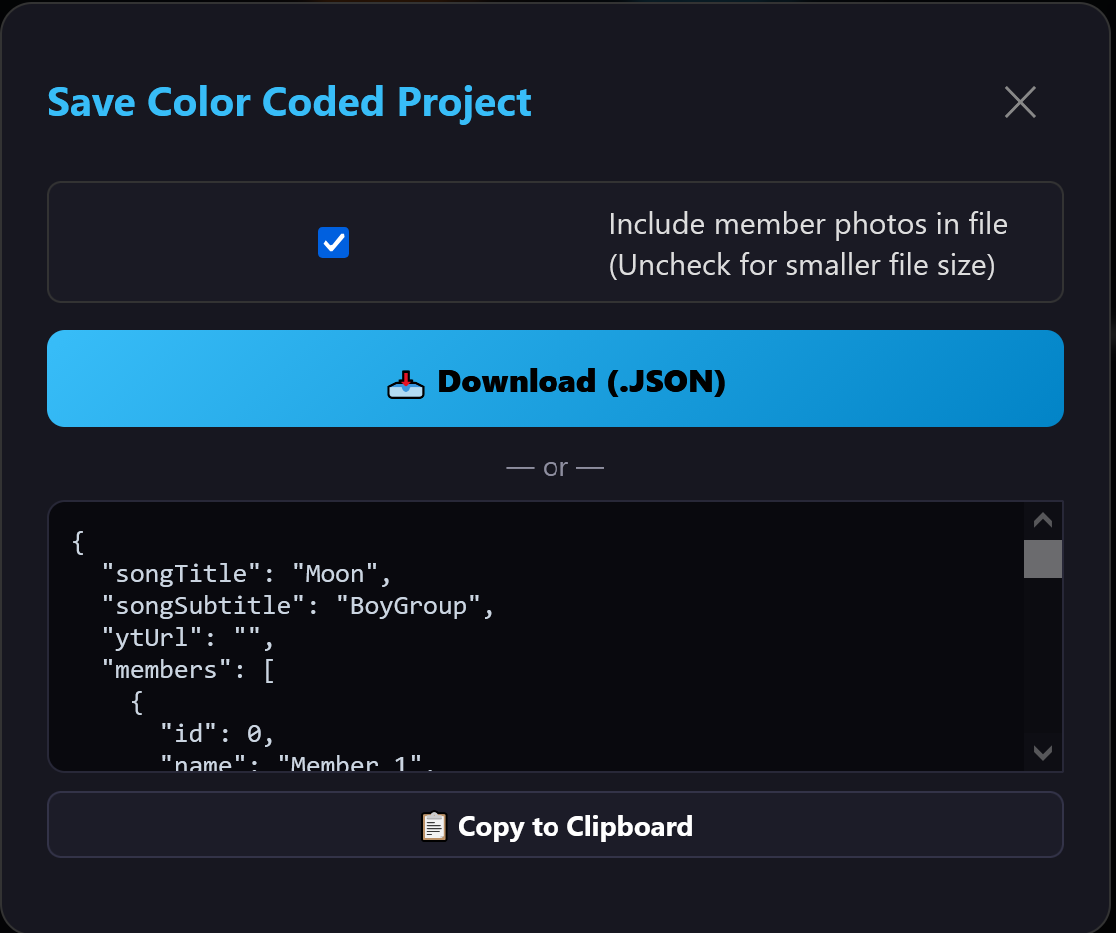 [Image: JSON Project Modal]
Saving & Loading Projects
Save your progress at any time with the 💾 Save (.JSON) button. We strongly advise downloading the backup file to your computer, though copying the JSON text directly to your clipboard is also supported. Later, you can upload the file or paste the code into the Load modal to pick up where you left off. Project files are fully cross-compatible between Color Coded and Line Distribution modes.